Sunday, October 19, 2008

mini series 2; supplies and facilities


...well, not quite yet. First and foremost, you need a good place to build all of this stuff. That means ventilation, and a place that is not going to interfere with other people. In my case, that happens to be my hall and my bedroom, haha.
Realize that the foam is going to get EVERYWHERE so have some sort of system of disposing of your carvings. in my case, i have one of those tables that expands from the middle, so i lined the gap with trash bags that connect to a bin under the table. that way i can brush all the extra stuff into the gap and it disappears!


SUPPLIES: I got all of this stuff can be bought at home depot.

base:
Your sets will need a firm base. I used a big peice of plywood maybe a half inch thick.

Foam: I bought some fancy blick carve foam, which makes it very easy to carve and has a sandy look, but insulation foam is just as good, much cheaper, and sold at HD.


Also, I found this blue foam in a dumpster. It is much more firm and will make good rock cliffs.


Gas masks: i have two, one light weight one for carving so that i do not inhale actual foam particles, and one more expensive one with carbon filters for when i am using chemicals. also have glasses and latex gloves.

ADHESIVES:
-contact cement or pva wood glue. this is used to glue the foam to the base and foam to foam. I used contact cement, which is the white tin can. this stuff is really toxic so make sure you do this in a ventilated room and give it time to dry.
- spray adhesive: usefull for adding sand and texture. i used the number 77, the second highest strength. next time i will get 90.

spray paint: get a couple colors, they are cheap and fun.

insulator spray: this "great stuff" is really great stuff. you spray it out of the can like cheese whizz and it hardens. you can spray paint it while it's still wet for a sort of sulfur type of look. i have yet to use it to its full potential but hopefully we will be talking more about it. thanks to alex for the tip.


TOOLS: a normal saw, hammer and screwdriver etc will come in handy. the stilletto thing i think is a plaster knife, and the cheese grater thing is a rasp. sandpaper is usefull too. other than that, most of these tools can be found in the ceramic area at pearl paint. that everything is covered with foam, this stuff really is messy.

ok, we're ready to begin, I hope...

mini series 1: reference and conceptualization.

Before we begin this exciting magical journey, it is good to know what you want your sets to look like. Actually visiting such places first hand is the most beneficial, but photographs and concept art can work just fine. What is the mood you are trying to set? What is the scale of the landscape? A trick to making great foreign environments is taking elements from our planet and altering them to suit your new landscape. The best concept artists are able to strike that great balance between familiarity and alien-ness. This link below has some of the strangest looking things on the planet.

http://www.darkroastedblend.com/2008/09/most-alien-looking-place-on-earth.html
here are some pictures of when i went to the grand canyon and death valley:


Simultaneously, it is good to think about what kinds of organisms are going to inhabit the landscape. How are they going to travel across the terrain? What elements will they utilize to live in, hunt for food? In our case, we have a giant bug that lives in a crater, stalks his prey by emanating a poisonous toxin that draws them towards his nest. okay, i could go on and on about visual reference and building your visual library, but at some point we have to begin. So the next thing to do is carefully storyboard your film so that you exactly what shots you will need. This will save you time. Instead of building one massive set with everything inside it, you can build multiple smaller sets that are custom built to fit your shots. for instance, if you have a closeup of a guys helmet on the ground, you would want a seperate set with a larger grain so that it looks very close.
Next it is always good to draw your landscape a bunch of times to see what kind of basic shapes you are looking for, and to work out composition and color. Check out the work of the evertalented Sparth.
it is great to look at professional's work to see what they envision, but at some point you should draw it yourself to get specific to your own needs and to have your vision. You may be a fantastic carver and a poor drafter, yet i still believe that the cognitive process of drawing will inform your carving.

Ok, enough said about that. On to the actual building....


a new mini series

hey yall, so most of you reading this probably know that i am spending most of my time building miniature sets for an alien desert valley this semester. well, recently it dawned on me that it might be helpful to other aspiring set builders if i started posting during the process.

unfortunately i decided this a little bit late, so i will have to fill you in just a bit. So here we go.

Sunday, October 12, 2008

miniature miniatures


these little tests are only a couple inches big because i have no idea what i am doing.

Saturday, September 20, 2008

boards

these are some thumbnail boards i did at some point. we ended up not going with it, too much like batman, but it was a beneficial exercise to draw very small because it forces you to worry about composition primarily.


this is a board that we do like.

final bug design


its been a long journey. took off three legs. took off one third of his body, added 3 eyes. boards to come...

Saturday, September 6, 2008

Friday, August 22, 2008

aethiopicus

hey everybody i finally got around to posting aethiopicus on youtube, so here it is! stay tuned,... part two will be here shortly...
http://www.youtube.com/watch?v=lmJzh6w-9mM


Monday, August 11, 2008

spring studio day 2

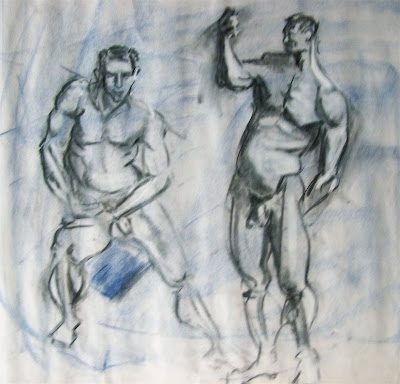
5 min.10 min.
5 min.
35 min.

this last one has some obvious problems, as minerva pointed out, but she also said that it was put down with a vigor. that might be the nicest thing she's said to me in two years!

Sunday, August 10, 2008

Monday, August 4, 2008

hey yall, i built a table!


One thing I have learned from this project is this: Only strive for symmetry on the macroscopic level. In pursuit of perfection, you will enrage yourself and surely fail. It is much easier to accept that a piece of wood is not straight, and find a mate that comfortably fits its curves.

Friday, August 1, 2008

sketchbook


drawing is fun and relaxing and nice. for a certain amount of time you cannot go anywhere else. it is like a wormhole in your day and the scheduling pressures are at least momentarily relieved. this allows you to release your anxieties and subconscious feelings without feeling selfconscious that someone is looking over your shoulder. growing up i remember that i did most of my heavy thinking and math homework on the toilet. i also remember one time when my mother tried to train our cat to use the toilet. needless to say that didn't work.

flashy

all summer long i've been interning at augenblick studio working on their awesome new show superjail, which should be on adult swim in october. unfortunately i can't show any of it here, but instead here is something i did inbetween assignments (no pun intended, aha).